flowchart TD
A[Get elevation data] -->|Large catchment| B[Global dataset]
A -->|Small catchment| C[LiDAR]
B --> D[Clip DEM to catchment boundary]
C --> D
D --> E[Build mesh]
E -->|Determine Z scale, sizing, etc.| F[Convert to STL]
F --> G[Send to 3D printer]
1 Introduction
Are you part of a catchment group or similar organisation and interested in creating a physical model of your catchment for public outreach? Allowing people to touch and hold a miniature version of the landscape can be a powerful community engagement tool. 3D printing is an excellent way to achieve this. But how do you get started?
Here are a few tips to help you begin, using open-source software and publicly available data. If you prefer, you can also contact me on LinkedIn or Twitter with details about your catchment and your goals, and I will generate an STL model file for you free of charge. You can then take this to your local library or another 3D printing service to print.
2 What is 3D printing?
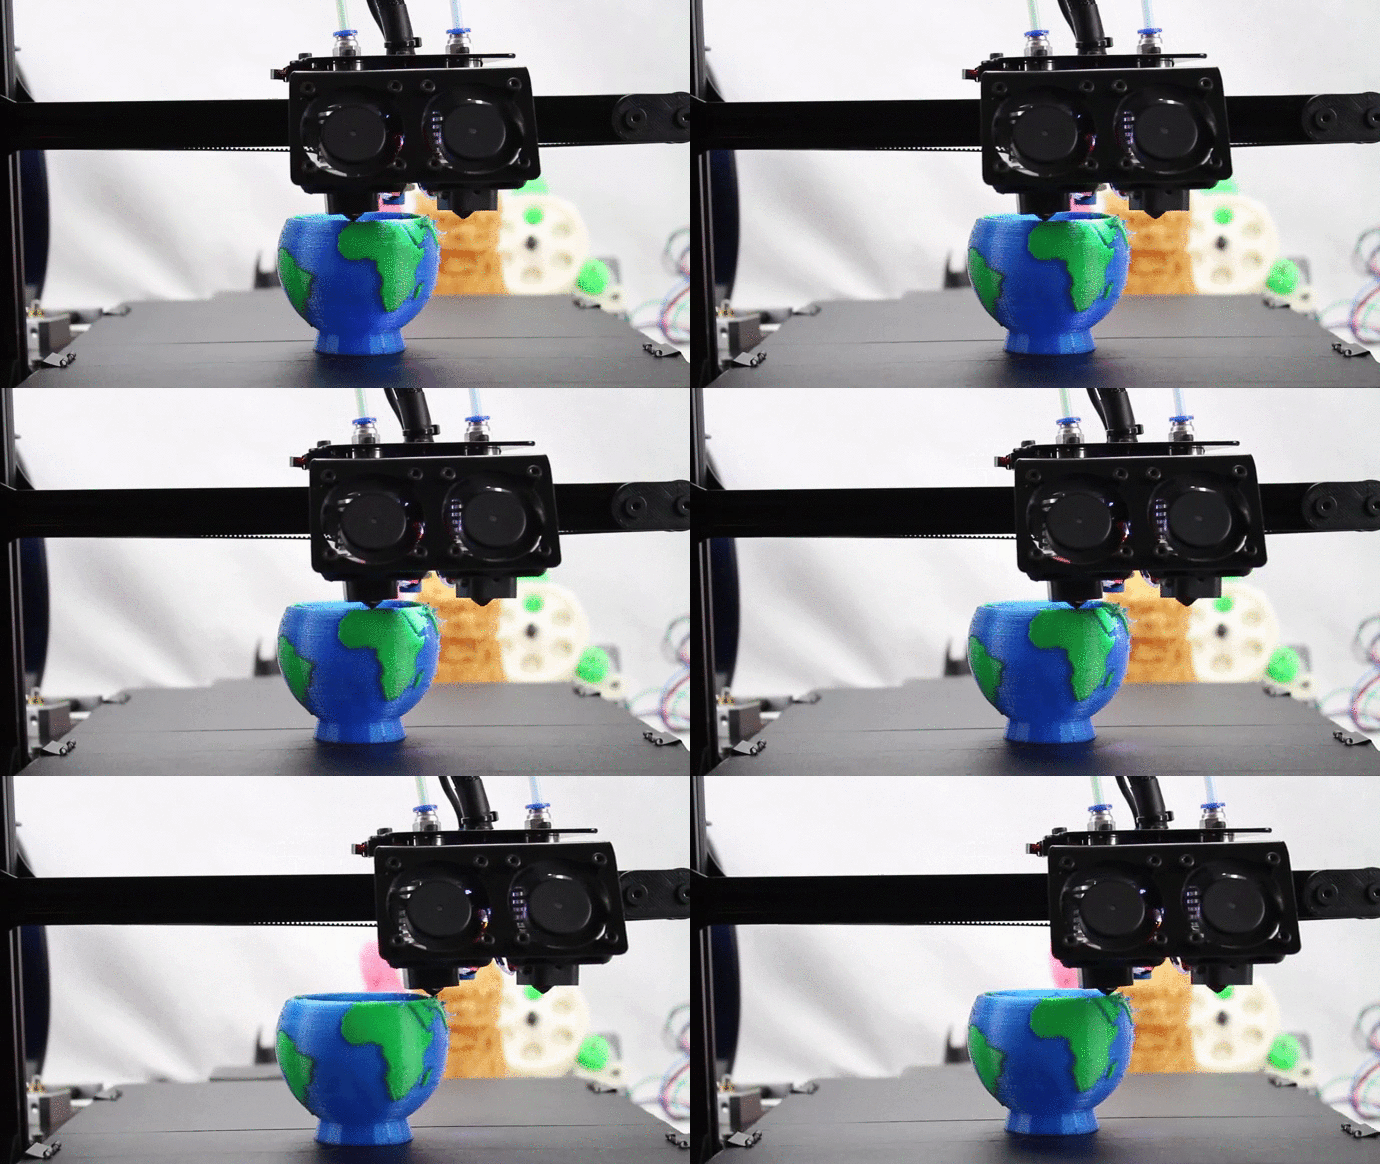
3D printers are affordable, desktop machines that create physical objects from digital files by building up layers of material, such as plastic or resin. Most 3D printers use a process called Fused Deposition Modelling (FDM), where a plastic filament is melted and extruded through a nozzle to form the object.
For those concerned about environmental impact, the most common filament, PLA, is biodegradable and made from renewable resources like corn starch.
3D printers are widely available and can be purchased for a few hundred dollars.1 If you prefer not to buy one, many libraries2, universities3, schools4, and makerspaces5 offer 3D printing services for a nominal fee. Additionally, commercial services are available to print your models for you.6
3 Getting started
To create a 3D model of your catchment, you’ll need a Digital Elevation Model (DEM) of the area. A DEM is a 2D representation of the terrain, where each pixel represents the ground’s elevation at that point.
There are many sources for DEM data, but one of the best is the LINZ Data Service. LINZ provides free access to a range of spatial data, including DEMs, which you can download and use at no cost.
Once you have your DEM, you’ll need to convert it into a format suitable for 3D printing software. This typically involves converting the raster data into a mesh, which is a collection of vertices and faces defining the object’s shape.
Many tools are available for converting DEMs into 3D models, but one of the best is the rayshader package for R. Rayshader is an open-source package that allows you to create 3D visualisations of spatial data, including DEMs.
4 Mount Taranaki
Let’s start with an example of how to create a 3D model of Taranaki Maunga using rayshader. Although it’s not a catchment, it’s a beautiful landform and a great place to start.
We’ll use the plot_3d_vista function from the rayvista package to create a 3D model of Mount Taranaki. This function requires a latitude, longitude, radius (in meters), and a few other parameters to the model.
The function can also drape a satellite image over the model for a more realistic appearance. This isn’t needed for 3D printing, but it does enhance the model’s visual appeal for digital display.
Show libraries code
options(rgl.useNULL = TRUE)
rgl::setupKnitr(autoprint = TRUE)
library(rayshader)
library(rayvista)
library(sf)
library(terra)
library(elevatr)
library(RColorBrewer)
library(leaflet)
Tip
The below model is interactive, you can click and drag to move it around.
Show the code
taranaki <- plot_3d_vista(lat = -39.295783, long = 174.06395,
radius = 7000, phi=30, outlier_filter=0.001,
fill_holes = TRUE, zscale = 40,
elevation_detail = 10, overlay_detail = 13,
zoom = 0.6)
rgl::rglwidget(width = 800, height = 400)5 Ahuriri, Kakanui and Whangateau catchments
Now, let’s move on to a more complex example: creating a 3D model of a catchment from the mountains to the sea, including its estuary. We’ll use the Ahuriri, Kakanui, and Whangateau catchments as examples (Figure 1), because I recently printed out some models for a colleague who was working in these catchments.
We’ll follow a similar process as we did for Mount Taranaki, but with a few extra steps to account for the catchment’s complex shape. We’ll need to clip the DEM to the catchment boundary, downsample it to reduce the resolution, and convert it to a mesh for 3D printing.
Show the code
# catchment boundary
whangateau <- st_read("/Users/isaacbain/working/estuary-mapping/data/whangateau_combined/whangateau_combined.shp", quiet = TRUE) |> st_transform(4326)
kakanui <- st_read("/Users/isaacbain/working/estuary-mapping/data/kakanui_combined/kakanui_catchment.shp", quiet = TRUE) |> st_transform(4326)
ahuriri <- st_read("/Users/isaacbain/working/estuary-mapping/data/ahuriri_combined/ahuriri_combined.shp", quiet = TRUE) |> st_transform(4326)
# Define colours for each layer
colors <- brewer.pal(3, "Set1")
whangateau_color <- colors[1]
kakanui_color <- colors[2]
ahuriri_color <- colors[3]
# Create custom labels for each layer
whangateau$label <- "Whangateau"
kakanui$label <- "Kakanui"
ahuriri$label <- "Ahuriri"
# Create the Leaflet map
leaflet() %>%
addProviderTiles(providers$CartoDB.Positron) %>%
addPolygons(
data = whangateau,
color = whangateau_color,
weight = 2,
opacity = 1,
fillOpacity = 0.5,
group = "Whangateau",
label = ~label,
labelOptions = labelOptions(
noHide = TRUE,
direction = 'right',
offset = c(3, 0))
) %>%
addPolygons(
data = kakanui,
color = kakanui_color,
weight = 2,
opacity = 1,
fillOpacity = 0.5,
group = "Kakanui",
label = ~label,
labelOptions = labelOptions(
noHide = TRUE,
direction = 'right',
offset = c(6, 0))
) %>%
addPolygons(
data = ahuriri,
color = ahuriri_color,
weight = 2,
opacity = 1,
fillOpacity = 0.5,
group = "Ahuriri",
label = ~label,
labelOptions = labelOptions(
noHide = TRUE,
direction = 'right',
offset = c(3, 0))
) %>%
addLegend(
"bottomright",
colors = colors,
labels = c("Whangateau", "Kakanui", "Ahuriri"),
title = "Catchments",
opacity = 1
)5.1 Data sources
Catchment boundaries
For sea-draining catchments in New Zealand, the Ministry for the Environment offers a dataset of sea-draining catchment boundaries7 available for download.
For sub-catchments that don’t reach the sea, you might need to look elsewhere. Your local Regional Council is a good starting point. If you don’t have luck there, you can derive custom catchment boundaries from a DEM or combine precomputed watershed areas from the digital river network. This process is more involved and won’t be covered in this post, but it’s definitely doable.
Estuary boundaries
To add the estuary itself, you can use NIWA’s Estuarine Environment Classification dataset8, which includes the boundaries of most estuaries in New Zealand. Or LINZ topographic maps are a good source too.
Elevation data
For elevation data, LINZ provides high-resolution LiDAR data9 that is increasingly available for New Zealand. This data is essential for creating a detailed 3D model of your catchment, especially for small catchments where detail is crucial. For larger catchments, lower resolution satellite DEMs may suffice and are easier to work with in terms of file size.
5.2 Kakanui
Let’s start off with Kakanui. It’s the easiest because it’s fairly large, allowing us to use elevation data from a global dataset. In this case, we’ll use Amazon Web Services Terrain Tiles.
Regarding the Kakanui, LAWA tells us:
The Kakanui River catchment has an area of 894 km2
The catchment is contained by the Kakanui Mountains and Pisgah Spur (1634m) to the west and south. In the north, the catchment is separated from the Waitaki catchment by rolling hill country. The main tributaries of the Kakanui River are the Kauru River (catchment area 143 km2), Island Stream (122 km2) and Waiareka Creek (213 km2).
Water quality in the upper Kakanui River is excellent.
Show the code
# libraries ---------------------------------------------------------------
library(sf)
library(elevatr)
library(geodata)
library(rayshader)
library(dplyr)
library(mapview)
# pre-processing ----------------------------------------------------------
# import catchment boundary
kakanui <- st_read("/Users/isaacbain/working/estuary-mapping/data/kakanui_combined/kakanui_catchment.shp")
# get elevation data using elevatr package, from global dataset
kakanui_elev <- get_elev_raster(kakanui, # location of interest
z = 11, # zoom level (detail)
clip = "location", # clip to catchment boundary
prj = st_crs(kakanui)$proj4string) # inherit projection from catchment boundary
# convert to matrix
kakanui_mat <- raster_to_matrix(kakanui_elev)
# rayshader ---------------------------------------------------------------
# Create rayshader plot
kakanui_mat |>
sphere_shade(texture = "imhof1", sunangle = 45) |> # creates colour gradient
add_shadow(ray_shade(kakanui_mat), 0.5) |> # adds shadow
add_shadow(ambient_shade(kakanui_mat), 0) |> # adds ambient light (looks nice but very slow)
plot_3d(kakanui_mat, zscale = 12, zoom = 0.6, theta = 50, phi = 20, windowsize = c(1080, 1080)) # define plot parameters
# Create spinning animation
render_camera(theta = seq(0, 360, length.out = 360), phi = 30, zoom = 0.6) # define camera parameters, spin around y-axis
render_movie("kakanui_spinning.mp4", fps = 24, frames = 360, zoom = 0.6) # create spinning animation5.3 Whangateau
Next, we’ll move on to the Whangateau catchment. This catchment is smaller, so we’ll use LINZ LiDAR data to obtain more detailed elevation information for the model.
Again, LAWA tells us:
The Whangateau estuary is a permanently open tidal lagoon on the northeast coast. The estuary is highly valuable for wildlife, providing rich feeding grounds for many migratory and endemic shore birds. In the upper reaches of the harbour an ecologically significant sequence of seagrass and mangroves transition into saltmarsh and coastal kahikatea swamp forest (Omaha Taniko Wetlands Scientific Reserve).
Freshwater inputs to the estuary are low and over 90% of the estuary’s volume is flushed during each outgoing tide. Native forest covers a quarter of the catchment, with rural land uses and exotic forest making up the rest. The monitoring sites have low mud content in comparison to other estuaries in the region and the estuary is in good overall health.
Show the code
# libraries ---------------------------------------------------------------
library(rayshader)
library(rayvista)
library(sf)
library(terra)
# pre-processing ----------------------------------------------------------
# import elevation data, folder full of tif files to be merged
tif_folder <- "/Users/isaacbain/working/estuary-mapping/data/lds-auckland-north-lidar-1m-dem-2016-2018-GTiff/"
tif_files <- list.files(path = tif_folder, pattern = "\\.tif$", full.names = TRUE)
# Read all tif files into list
raster_list <- lapply(tif_files, terra::rast)
# catchment boundary
whangateau <- st_read("/Users/isaacbain/working/estuary-mapping/data/whangateau_combined/whangateau_combined.shp")
# Convert the sf polygon to a SpatVector
polygon_spatvector <- terra::vect(whangateau)
# Merge the rasters using do.call and terra::mosaic
merged_raster <- do.call(terra::mosaic, raster_list)
# Clip the merged raster by the catchment bounadry
clipped_raster <- terra::crop(merged_raster, polygon_spatvector)
clipped_raster <- terra::mask(clipped_raster, polygon_spatvector)
# Define the aggregation factor (e.g., factor = 2 reduces the resolution by half)
factor <- 4
# Downsample the raster to reduce file size and improve performance
downsampled_raster <- terra::aggregate(clipped_raster, fact = factor, fun = mean)
# Convert to a matrix suitable for rayshader
elevation_matrix <- raster_to_matrix(downsampled_raster)
# rayshader ---------------------------------------------------------------
# Create rayshader plot
elevation_matrix |>
sphere_shade(texture = "imhof1", sunangle = 45) |> # creates colour gradient
add_shadow(ray_shade(elevation_matrix), 0.5) |> # adds shadow
add_shadow(ambient_shade(elevation_matrix), 0) |> # adds ambient light (looks nice but very slow)
plot_3d(elevation_matrix, zscale = 2, zoom = 0.7, theta = 50, phi = 20, windowsize = c(1080, 1080)) # define plot parameters
# Create spinning animation
render_camera(theta = seq(0, 360, length.out = 360), phi = 30, zoom = 0.7) # define camera parameters, spin around y-axis
render_movie("whangateau_spinning.mp4", fps = 24, frames = 360, zoom = 0.7) # create spinning animation5.4 Ahuriri
Finally, we have the Ahuriri catchment. The Ahuriri is notable because the 1931 Hawke’s Bay earthquake lifted the area 1-2 metres, draining most of the water and only leaving a remnant estuary. Further drainage has occurred to enable residential and industrial land uses.
HBRC tells us:
Ahuriri Estuary Te Whanganui-a-Orotū is a significant conservation area with high ecological value, as well as the Poukawa and Waitangi wetlands. Many native fish species, and rainbow and brown trout frequent the rivers. Surface water quality gradually decreases from a pristine ecological condition in the upper reaches of the catchment, to an ‘impacted rural condition’, to the worst water quality in urban areas.
Show the code
# libraries ---------------------------------------------------------------
library(rayshader)
library(rayvista)
library(sf)
library(terra)
# pre-processing ----------------------------------------------------------
# import elevation data, folder full of tif files to be merged
tif_folder <- "/Users/isaacbain/working/estuary-mapping/data/lds-hawkes-bay-lidar-1m-dem-2023-GTiff/"
tif_files <- list.files(path = tif_folder, pattern = "\\.tif$", full.names = TRUE)
# Read all tif files into list
raster_list <- lapply(tif_files, terra::rast)
# catchment boundary
ahuriri <- st_read("/Users/isaacbain/working/estuary-mapping/data/ahuriri_combined/ahuriri_combined.shp")
# Convert the sf polygon to a SpatVector
polygon_spatvector <- terra::vect(ahuriri)
# Merge the rasters using do.call and terra::mosaic
merged_raster <- do.call(terra::mosaic, raster_list)
# Clip the merged raster
clipped_raster <- terra::crop(merged_raster, polygon_spatvector)
clipped_raster <- terra::mask(clipped_raster, polygon_spatvector)
# Define the aggregation factor (e.g., factor = 2 reduces the resolution by half)
factor <- 8
# Downsample the raster
downsampled_raster <- terra::aggregate(clipped_raster, fact = factor, fun = mean)
# Convert to a matrix suitable for rayshader
elevation_matrix <- raster_to_matrix(downsampled_raster)
# rayshader ---------------------------------------------------------------
# Create rayshader plot
elevation_matrix |>
sphere_shade(texture = "imhof1", sunangle = 45) |> # creates colour gradient
add_shadow(ray_shade(elevation_matrix), 0.5) |> # adds shadow
add_shadow(ambient_shade(elevation_matrix), 0) |> # adds ambient light (looks nice but very slow)
plot_3d(elevation_matrix, zscale = 2, zoom = 0.7, theta = 50, phi = 20, windowsize = c(1080, 1080)) # define plot parameters
# Create spinning animation
render_camera(theta = seq(0, 360, length.out = 360), phi = 30, zoom = 0.7) # define camera parameters, spin around y-axis
render_movie("ahuriri_spinning.mp4", fps = 24, frames = 360, zoom = 0.7) # create spinning animation6 3D printing
Once you have your 3D model, you can export it to a file format suitable for 3D printing. The most common file format for 3D printing is STL, which describes the shape of an object as a collection of triangles.
You can export your 3D model to an STL file using the rayshader package’s save_3dprint function in R. This function takes a filename and a mesh object as input and writes the mesh to an STL file. You can also set the max_width parameter to scale the model to a specific size.
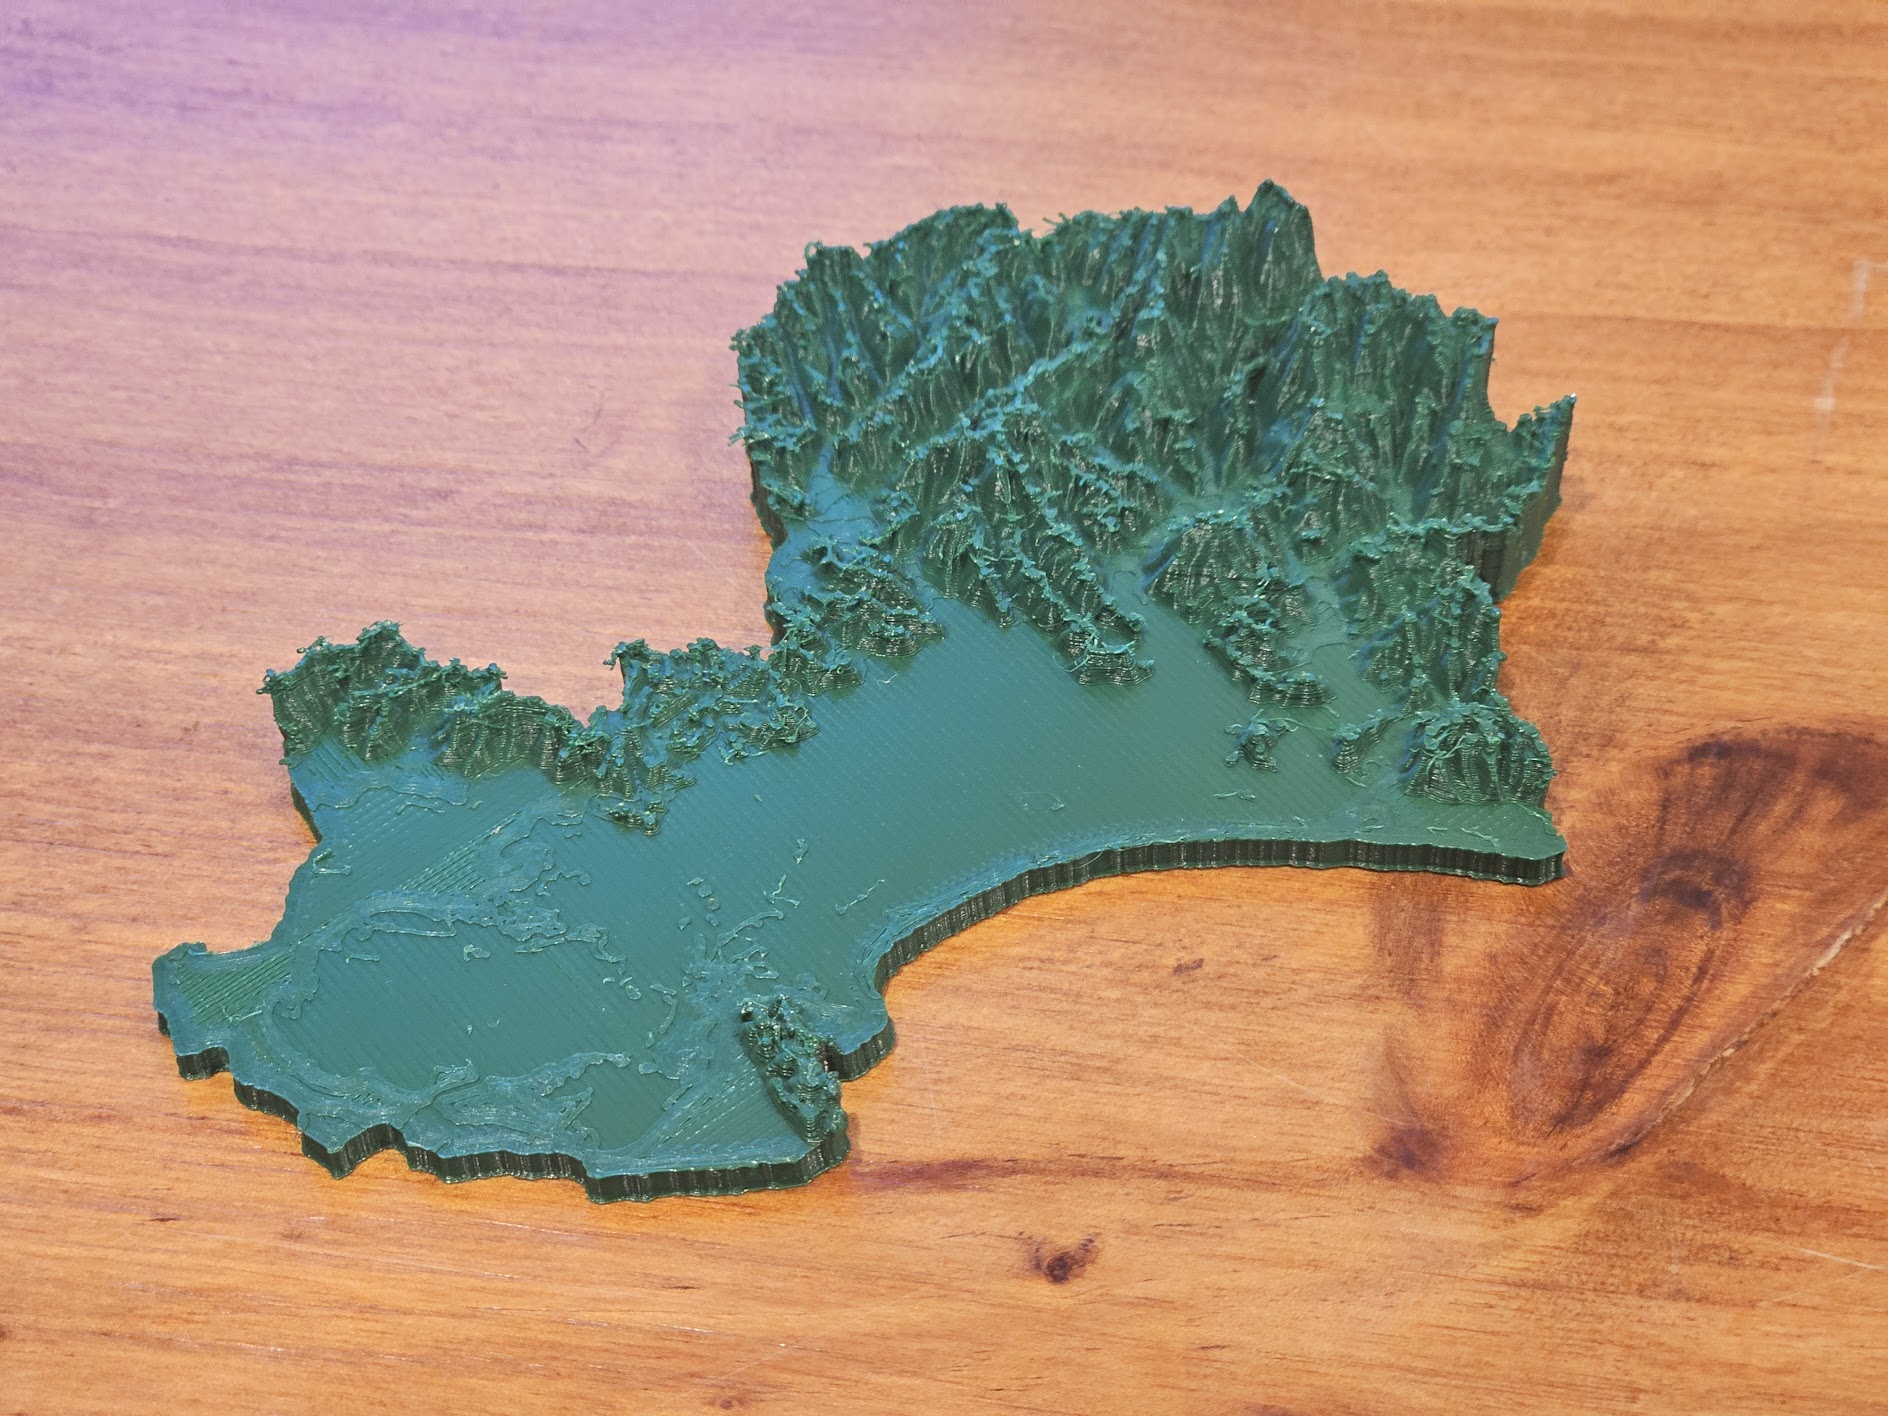
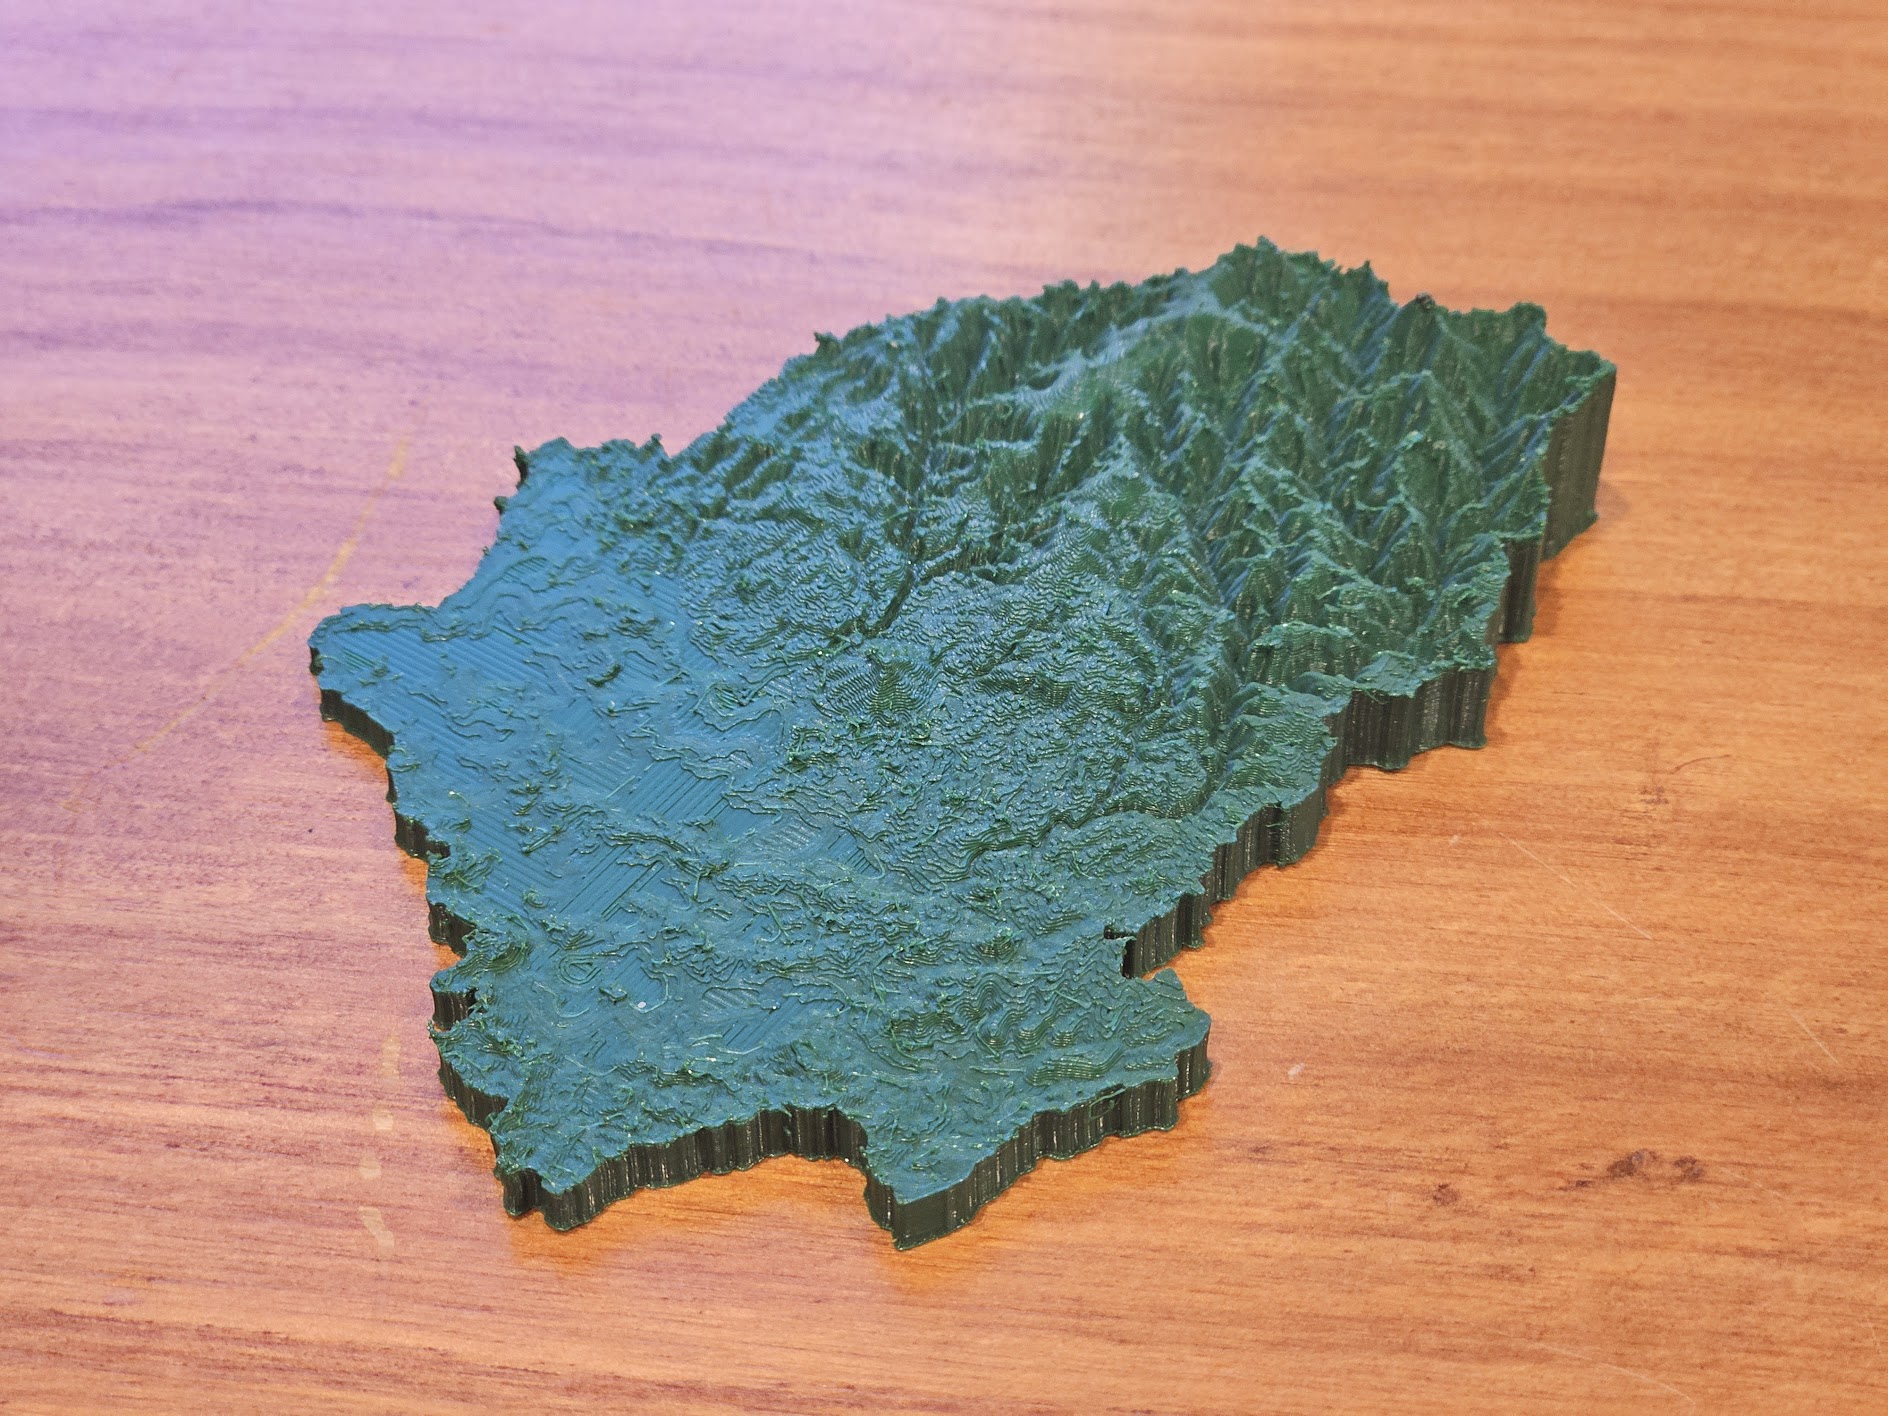
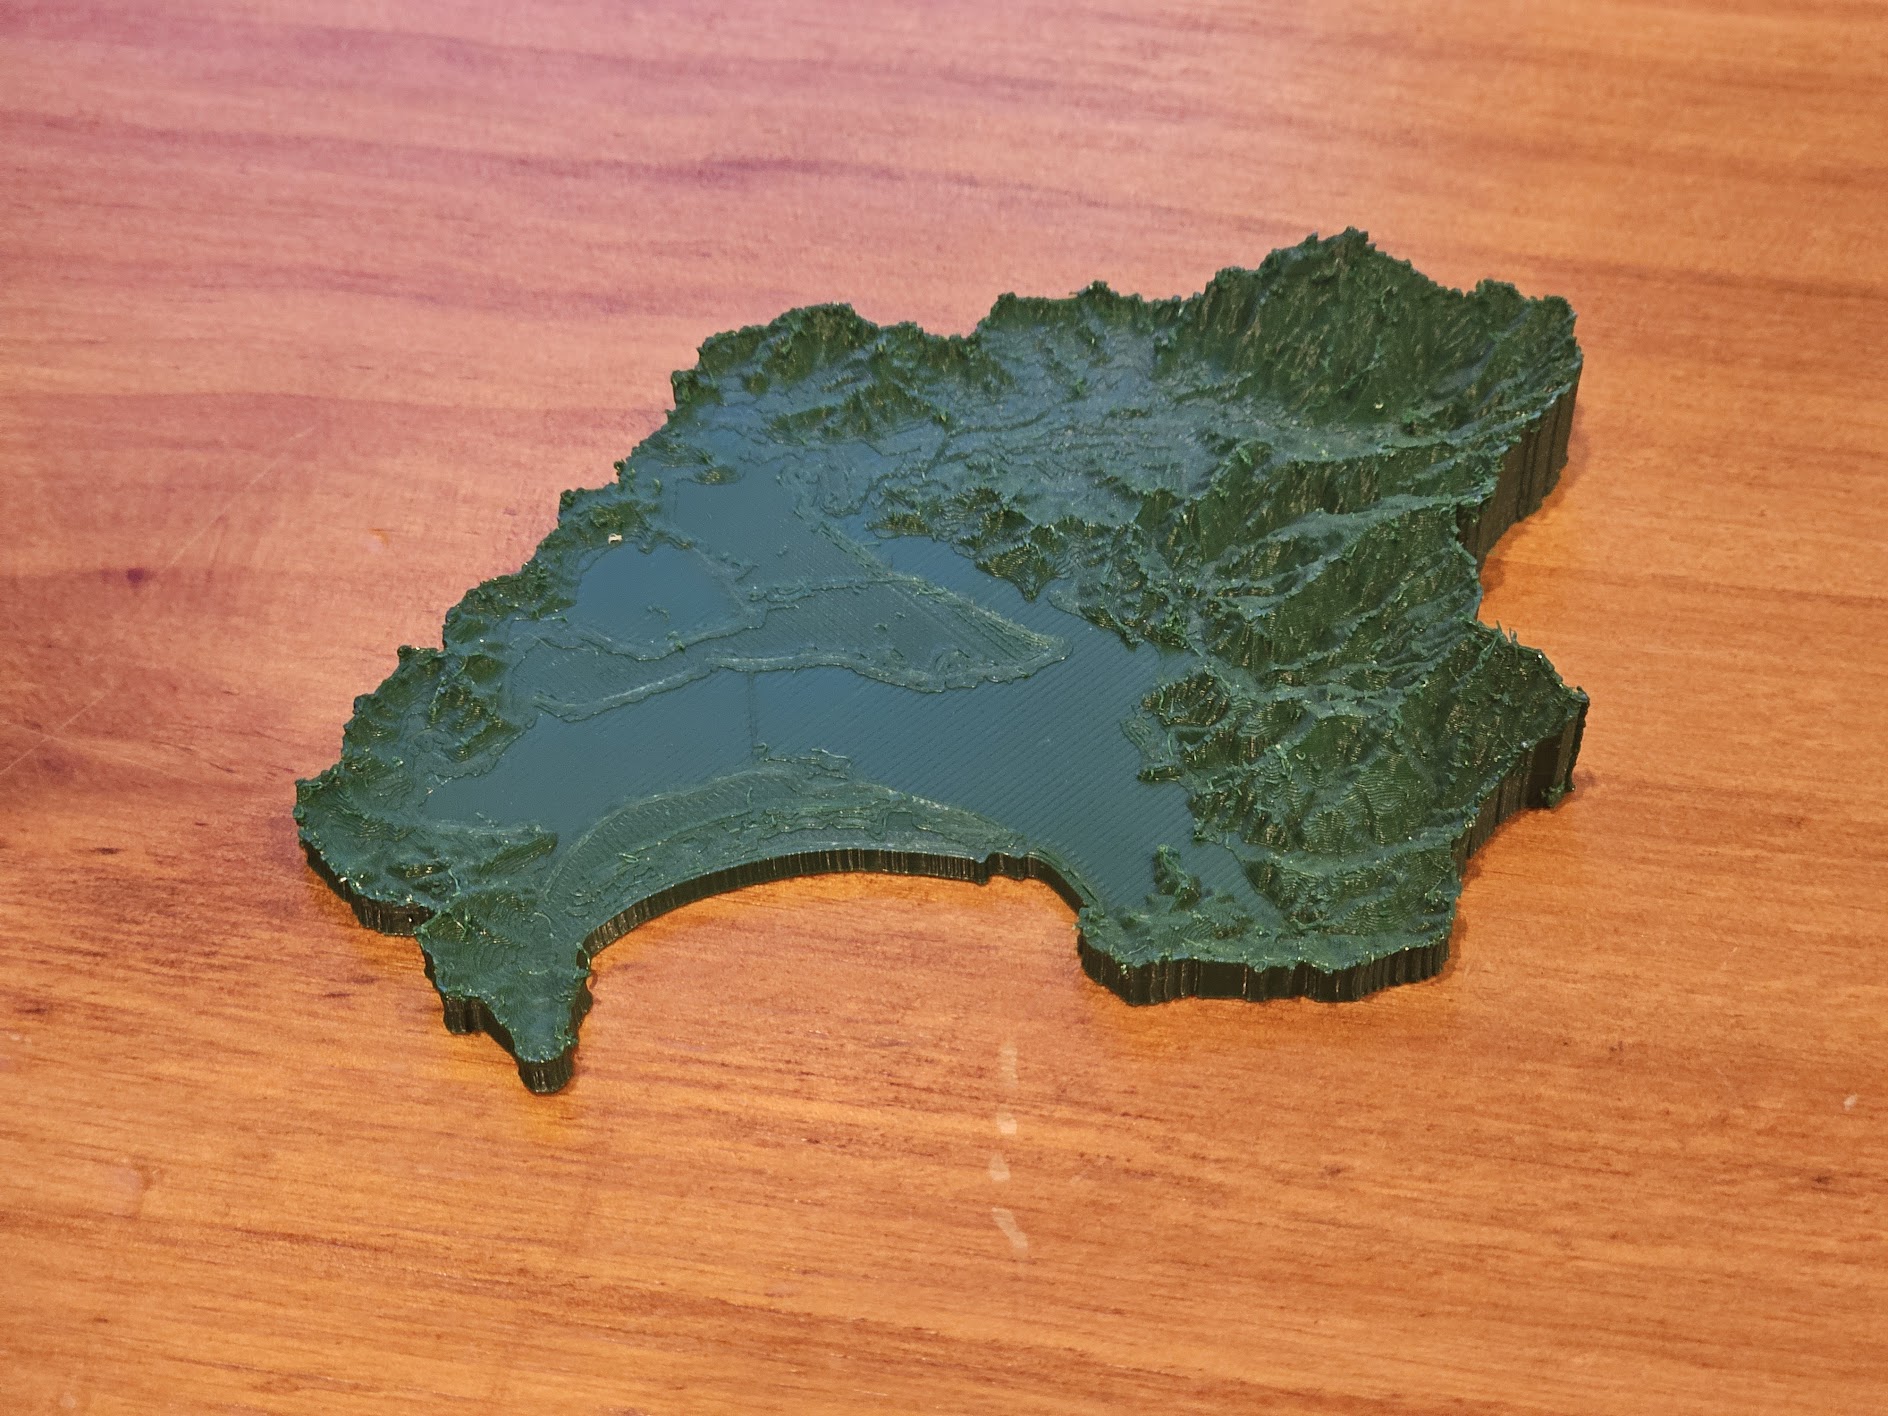
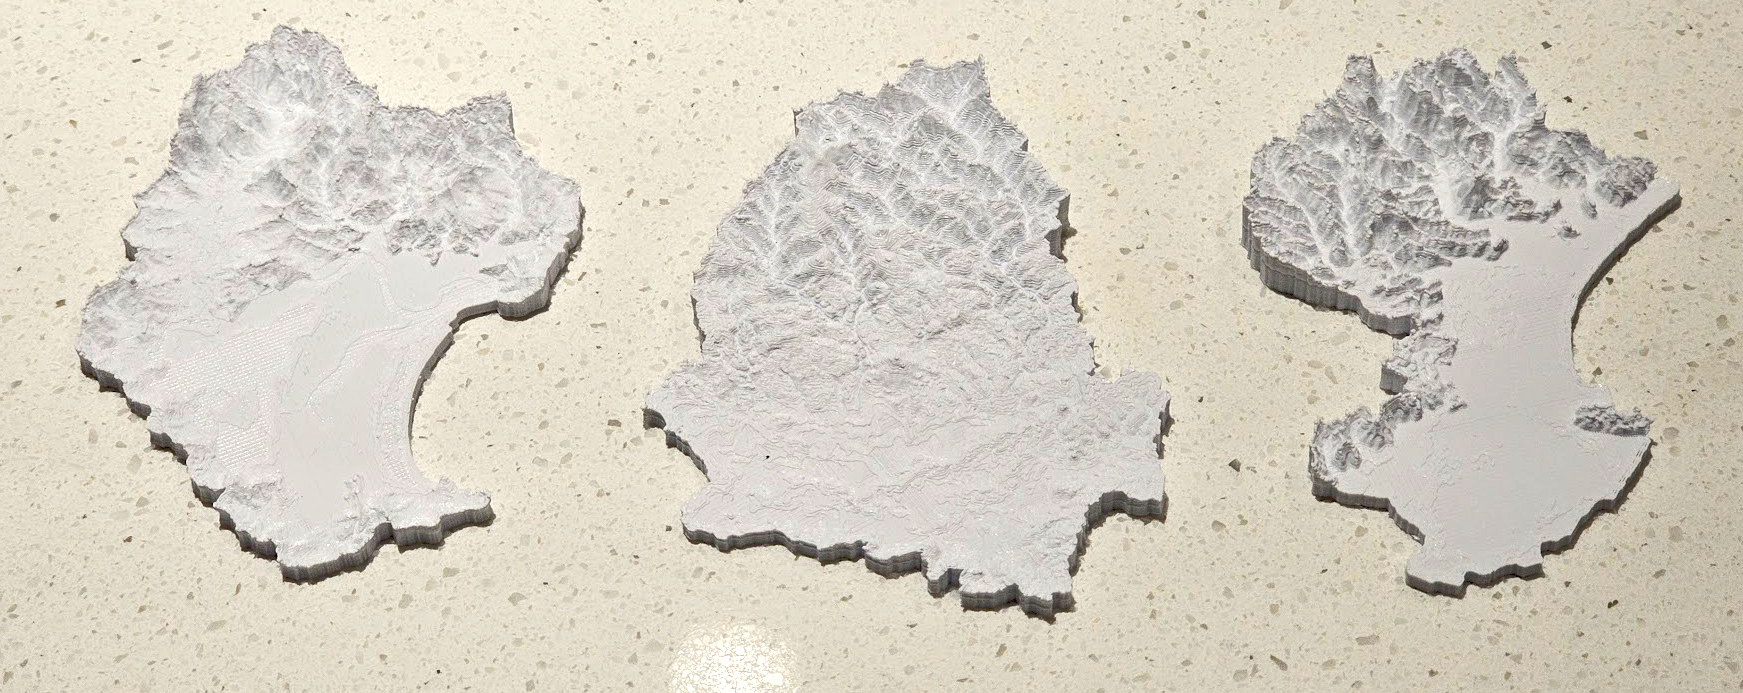
Here’s some that I printed off at home in a couple of different colours. The material cost to print one of these is minimal and takes a couple of hours.
7 Conclusions
Creating 3D models of catchments using DEM data and 3D printing technology provides an effective tool for public outreach and community engagement. This guide demonstrated how to use global datasets for larger catchments like Kakanui and high-resolution LiDAR data for smaller catchments like Whangateau and Ahuriri.
Using the rayshader and rayvista packages in R, we obtained and processed DEM data, created 3D models, and converted them to STL files for 3D printing. This workflow is straightforward, cost-effective, and leverages open-source software and publicly available data.
These 3D models offer a tangible way to communicate complex geographical and hydrological concepts, making them valuable for catchment groups, educators, and more.
And remember, if you’re a non-profit and like what you saw and want an STL file for your own group’s catchment, just let me know and I’ll see what I can do.
Tip
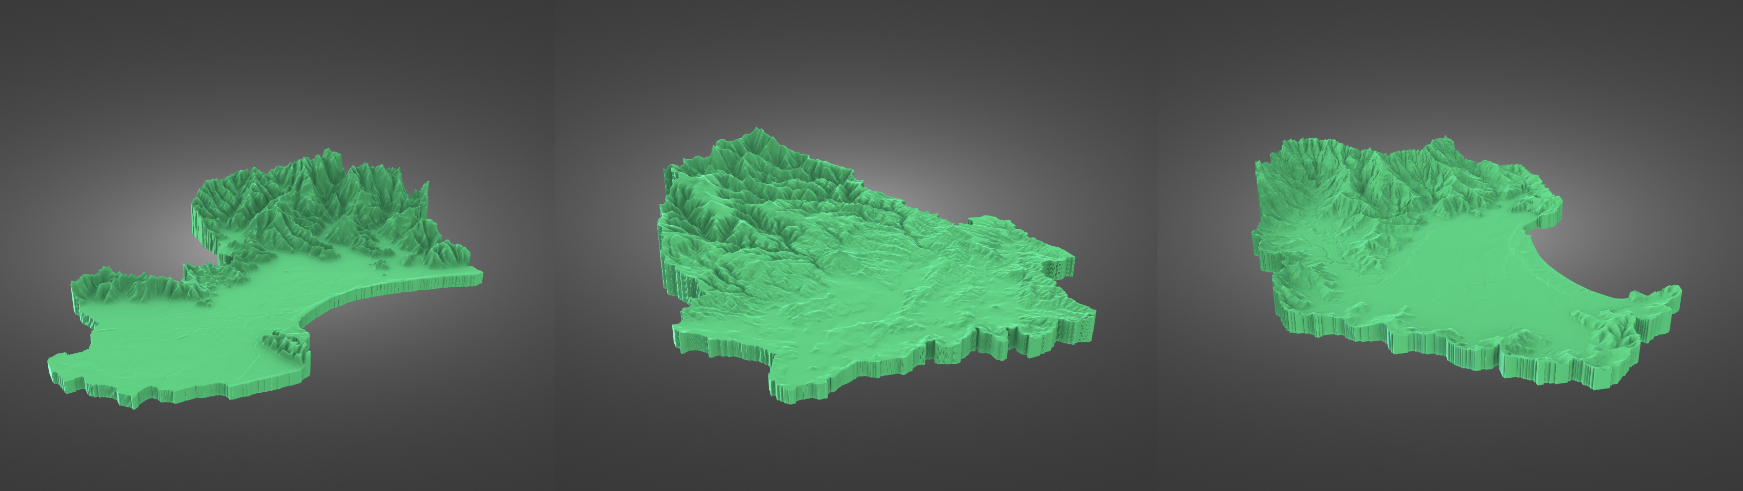
Want to 3D print these specific catchment models, or other models I’ve made? Head over to Thingiverse to check out my designs.
Footnotes
e.g. This is the model I use, available from a number of retailers.↩︎
https://elearning.tki.org.nz/Technologies/Hardware-for-learning/3D-printing↩︎
I’ve never tried any of these, but here’s one local option. https://www.makeshop.co.nz/3d-printing↩︎
https://data.mfe.govt.nz/layer/99776-sea-draining-catchments/↩︎
https://www.doc.govt.nz/nature/habitats/estuaries/estuaries-spatial-database↩︎
https://www.linz.govt.nz/products-services/data/types-linz-data/elevation-data↩︎